-

Installing Oracle Access Manager 11.1.2.2.4 on Windows Server 2012
Introduction
In this post we're going to review the installation process of Oracle Access Manager 11gR2 on Windows Server 2012.
This post is not going to deepen into the binaries installation, as it usually is a very simple task, but rather we'll go directly to the domain configuration.
Disclaimer: Windows Server 2012 is not certified yet with Identity and Access Management 11gR2, but a lot of customers are already moving away from Windows 2008, so these kind of installations are going to be more common everyday.
References
- Fusion Middleware Installation Guide for Oracle Identity and Access Management 11g Release http://docs.oracle.com/cd/E27559_01/install.1112/e27301/toc.htm
- Fusion Middleware Repository Creation Utility User's Guide http://docs.oracle.com/cd/E29542_01/doc.1111/e14259/index.html
- Oracle Fusion Middleware Supported System Configurations: http://www.oracle.com/technetwork/middleware/ias/downloads/fusion-certification-100350.html
- My Oracle Support: Master Note on WebLogic Server Patch Set Updates (PSUs) (Doc ID 1470197.1)
- My Oracle Support: OAM Bundle Patch Release History (Doc ID 736372.1)
Requirements
- Servers: virtual servers with at least 8 GB RAM and 2 cores.
- Operating System: Microsoft Windows Server 2012
- Database: Oracle Database Enterprise Edition 11.2.0.4 Instance. 4 GB memory target. 50 GB Disk space. Configure the following parameters:
- PROCESSES parameter equal or greater than 500
- SESSIONS parameter equal or greater than 500
- CHARACTER SET should be AL32UTF8
- Storage: 25 GB disk for binaries and configuration files
- Server Time Configuration: It's extremely important to synchronize the server where OAM will be running to the corporate NTP server, all servers integrated to OAM should have the same time, as it will be a key factor during authentication and validation of cookies. Discrepancies between servers could result in login failures and strage application behavior.
Downloads
In order to install OAM, you'll need to download the following software:
- Oracle JRockit (link: http://www.oracle.com/technetwork/java/javase/downloads/java-archive-downloads-jrockit-2192437.html)
- Oracle WebLogic Server 10.3.6 (link: http://www.oracle.com/technetwork/middleware/weblogic/downloads/wls-main-097127.html)
- Oracle Repository Creation Utility 11.1.2.2 (from http://edelivery.oracle.com)
- Oracle Identity and Access Management Suite 11.1.2.2 (link: http://www.oracle.com/technetwork/middleware/id-mgmt/downloads/oid-11gr2-2104316.html)
- Oracle Access Manager WebGates and Agents (link: http://www.oracle.com/technetwork/middleware/id-mgmt/downloads/oid-11gr2-2104316.html)
- Oracle WebLogic Server 11g PSU 10.3.6.0.10 (from My Oracle Support patch 19637463)
- Oracle Identity and Access Management BP 11.1.2.2.4 (from My Oracle Support patch 19718347)
Environment
- Host: oamserver1.mydom.com
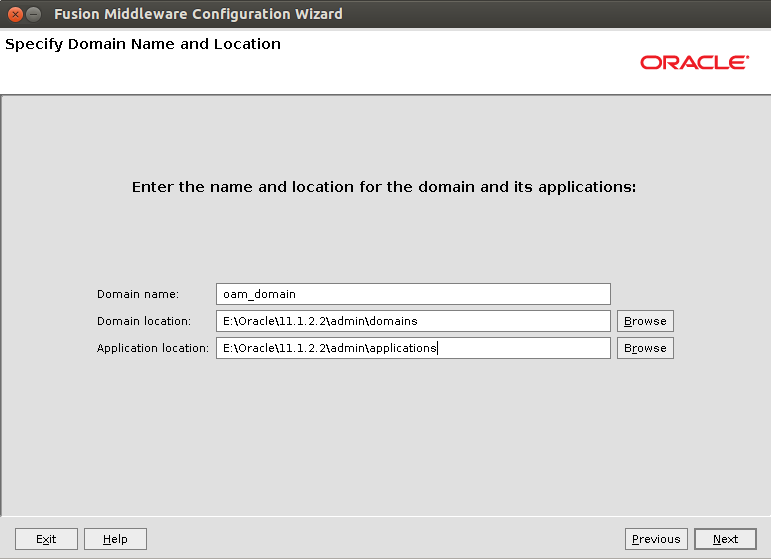
- Domain Name: oam_domain
- Domain Home: E:/Oracle/11.1.2.2/admin/domains/oam_domain
- Java Home: E:/Oracle/jrockit
- Middleware Home: E:/Oracle/11.1.2.2/middleware
- Weblogic Home: E:/Oracle/11.1.2.2/middleware/wlserver_10.3
- IDM Home: E:/Oracle/11.1.2.2/middleware/Oracle_IDM1
Installation
1. Install Binaries
Install Oracle software in the order established below. Keep in mind that the directories described in the section "Environment information" should be used for the Oracle Homes.
1. Oracle JRockit. Refer to Oracle Installation Guide on: http://docs.oracle.com/cd/E15289_01/doc.40/e15065/graphic.htm#BABDIHHD
2. Oracle Weblogic Server 11gR1 (10.3.6) + Coherence - Package Installer
Refer to Oracle Installation Guide on:
http://docs.oracle.com/cd/E23943_01/core.1111/e12036/install.htm#CBHCJIIF3. Oracle Identity and Access Management Suite 11.1.2.2. Refer to Oracle Installation Guide on: http://docs.oracle.com/cd/E27559_01/install.1112/e27301/install.htm#INOAM74534
4. Install WebLogic PSU 10.3.6.0.10 (patch 19637463)
5. Install Identity Management Bundle Patch 11.1.2.2.4 (patch 19718347)
2. Run RCU
1. Unzip RCU zip file.
2. Start RCU GUI by executing the file “rcuHome/bin/rcu”
3. Press “Next” on the Welcome screen
4. Select “Create Repository”
5. Type the database connection information:
-
- Database Type: select Oracle Database.
- Host Name: database hostname
- Port: database listener port
- Service Name: database service name
- Username: SYS
- Password: *****
- Role: SYSDBA
6. Select components:
-
- Select "Create new prefix". Use a descriptive prefix for the environemnt, DEV, TEST, PROD, etc.
- Select the following components
- AS Common Schemas
- Metadata Services
- Audit Services
- Oracle Platform Security Services
- Identity Management
- Oracle Access Manager
- AS Common Schemas
7. Define Schemas Password. Select “Use same password for all schemas”, type password
8. Tablespaces definition. Leave default options.
9. Create. End of repository creation.
3. Create WebLogic Domain
1. Login to oamserver1 as the installation owner
2. Execute "E:/Oracle/11.1.2.2./middleware/wlserver_10.3/common/bin/config.cmd"
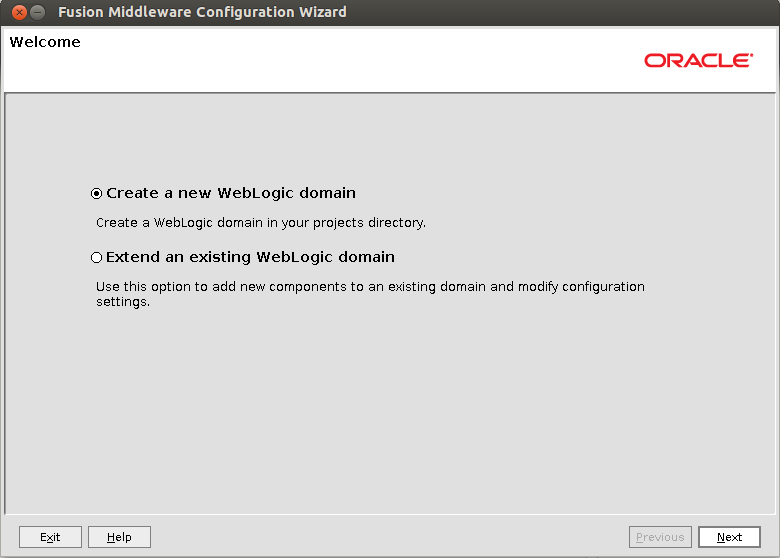
3. Select "Create a new WebLogic domain"
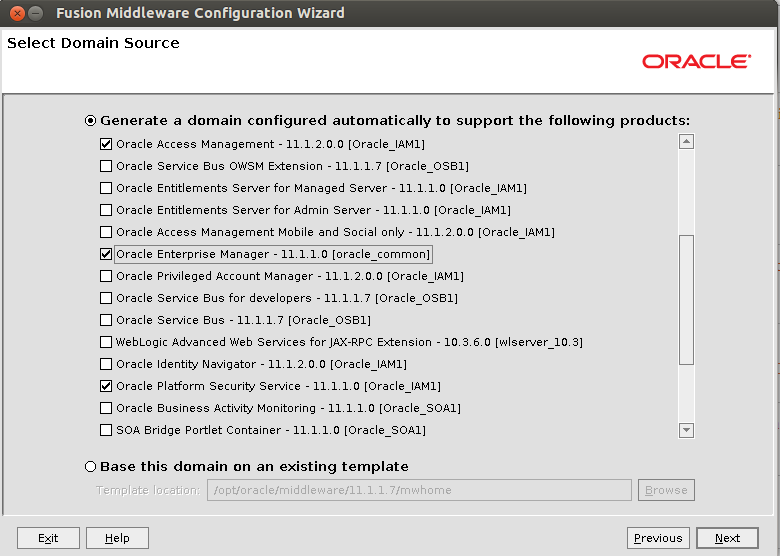
4. Select components:
-
- Oracle Access Management
- Oracle Enterprise Manager
- Oracle Platform Security Service
- Oracle JRF
5. Select the name and location of the domain:
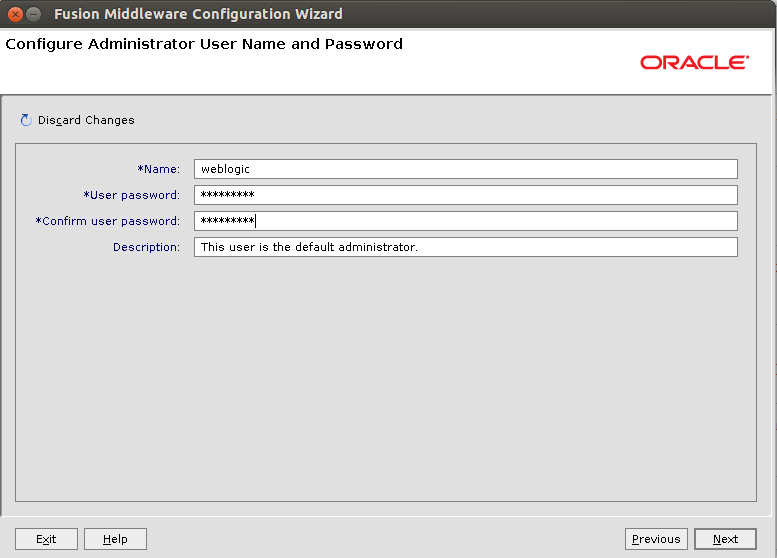
6. Configure Weblogic Administrator user and password:
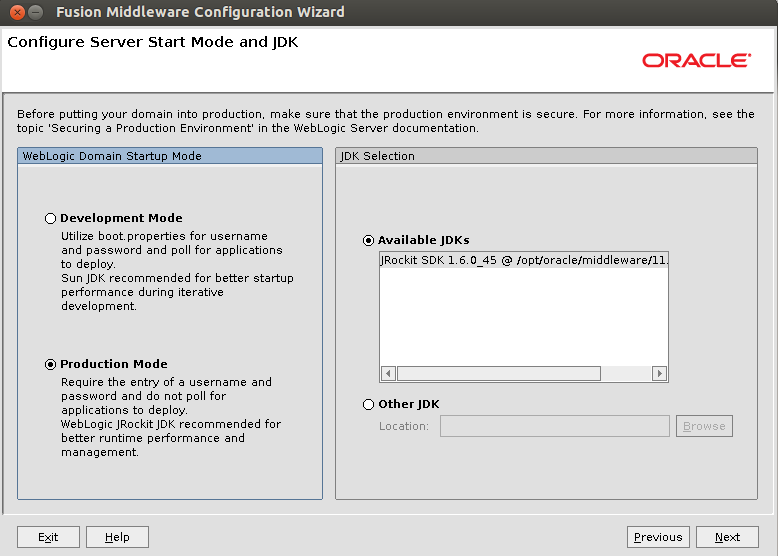
7. Configure Server Start Mode and JDK. Select "Production Mode", and select the JRockit JDK you installed.
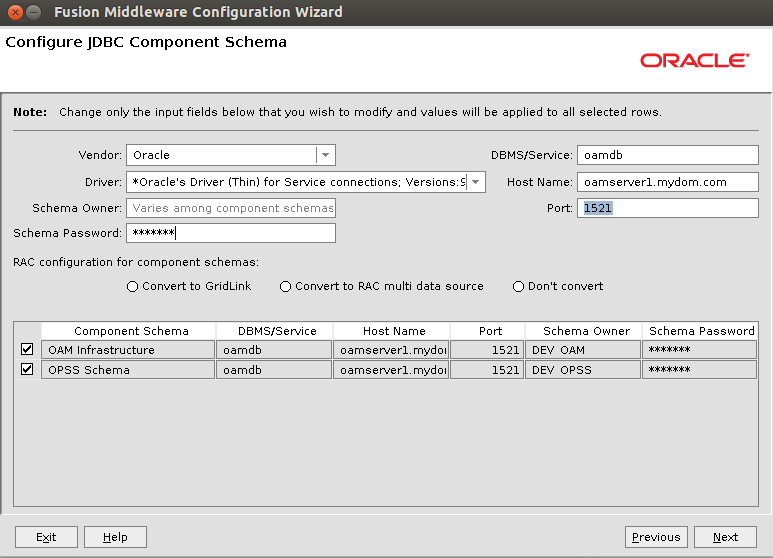
8. Configure JDBC Component Schema. In this step, you'll configure the OAM datasources using the database connection information of the metadata repository you created with RCU.
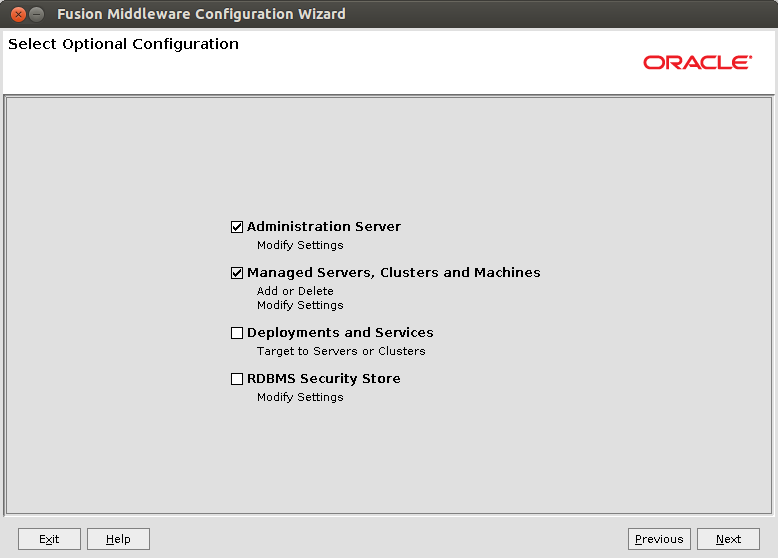
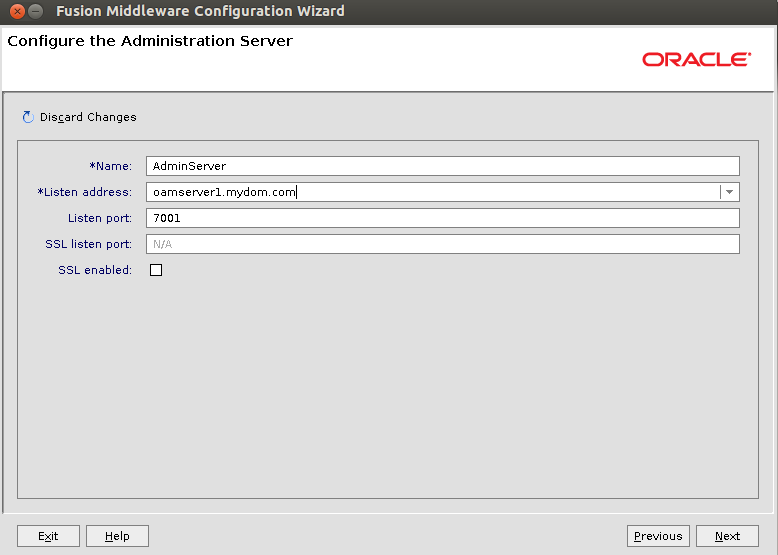
9. Select Optional Configuration. Select "Administration Server" and "Managed Servers, Clusters and Machines"
10. Configure the Administration Server. Select the listen address "oamserver1.mydom.com" and listen port "7001"
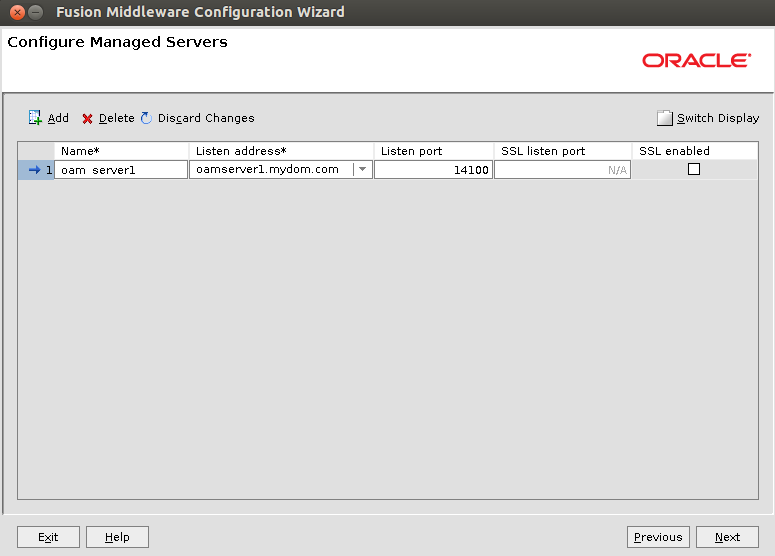
11. Configured Managed Servers. Select listen address "oamserver1.mydom.com" and listen port "14100".
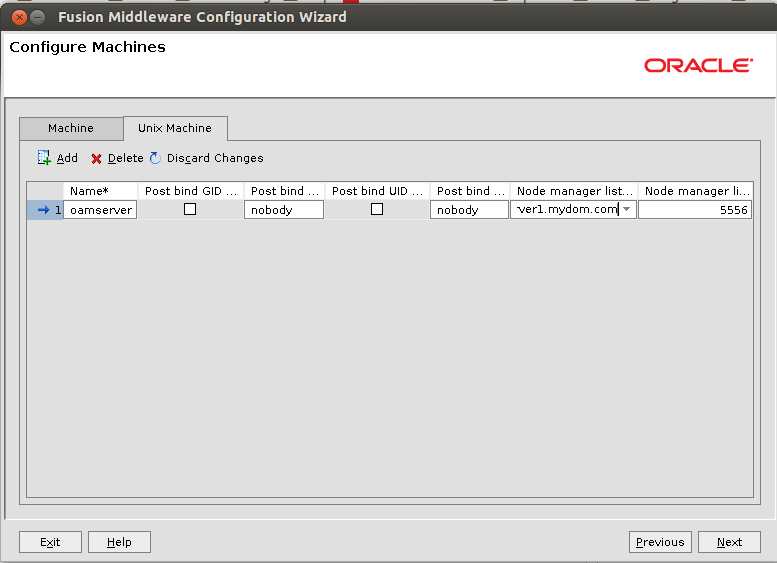
12. Configure Machines. Create a new Unix Machine named "oamserver". Define Node manager listen address as "oamserver1.mydom.com" and Node manager listen port as "5556".
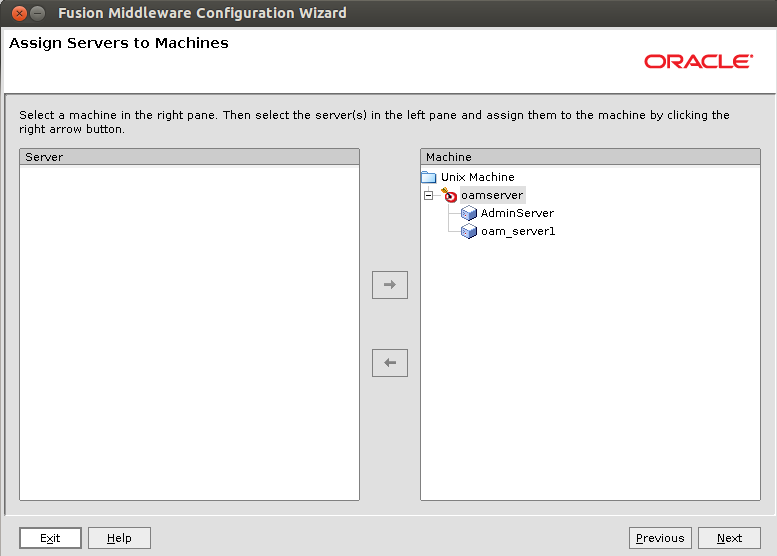
13. Assign Servers to Machines. Assign AdminServer and oam_server1 to machine "oamserver"
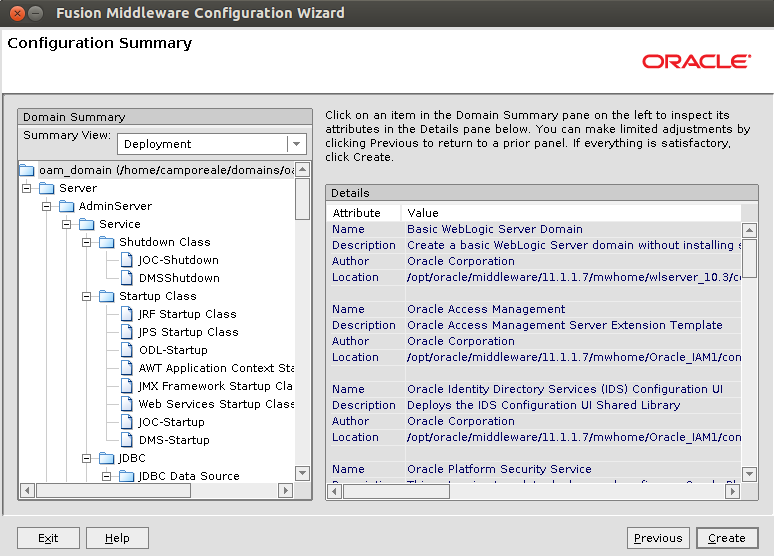
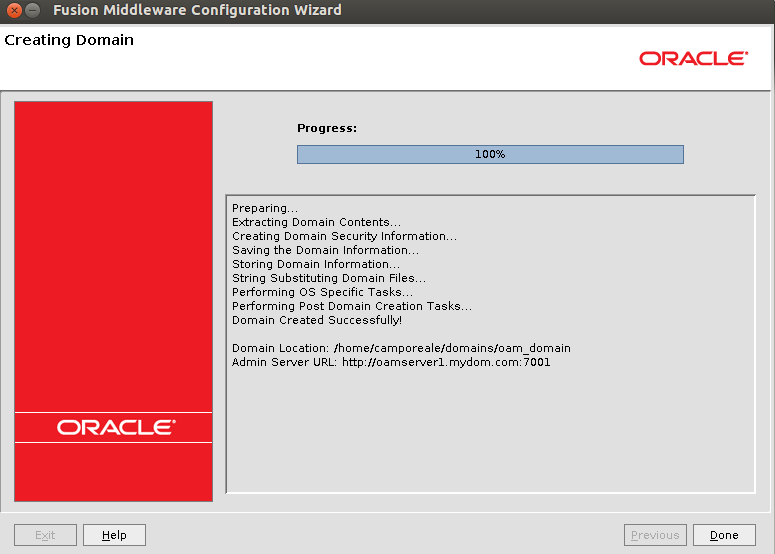
14. Configuration Summary. Review information and click "Create".
4. Update OPSS Schema with PSA
http://docs.oracle.com/cd/E40329_01/install.1112/e49521/install.htm#CIHDGEFI
1. Login to oamserver1 as the installation owner
2. Go to directory "E:/\Oracle/\11.1.2.2\/middleware/\oracle_common/\bin"
3. Execute psa.cmd
-
- Welcome screen
- Select components, you must select only the Oracle Platform Security Services schema.
- Prerequisite
- Schema. Define database connection information and schema name
- Examine
- Upgrade Summary
- Upgrade Success. Make sure the operation is sucessful.
5. Configure Security Store
http://docs.oracle.com/cd/E40329_01/install.1112/e49521/install.htm#CIHEDAJE
Note: Before executing this, be aware that if the operating system is Windows Server 2012, you'll receive the following error:
Failed to get environment, environ will be empty: (0, 'Failed to execute command ([\'sh\', \'-c\', \'env\']):
java.io.IOException: Cannot run program "sh": CreateProcess error=2, The system cannot find the file specified')In order to avoid this issue, you have to apply the workaround explained in My Oracle Support note "Error Configuring Database Security Store (Doc ID 1671040.1) ".
1. Login to oamserver1 as installation user2. Execute the following command:E:/Oracle/11.1.2.2./Middleware/oracle_common/common/bin/wlst.cmd E:/Oracle/Middleware/Oracle_IDM1/common/tools/configureSecurityStore.py -d E:/Oracle/Middleware/user_projects/domains/oam_domain -c IAM -p ***** -m createReplace "-p" value with the OPSS schema password.
6. Deal with installation bugs
After installing IDM 11.1.2.2.4, you'll have to deal with at least 2 known bugs:
1. Datasource error while starting managed server oam_server1: "<Datasource jdbc/oamds not found>"
This problem is described in My Oracle Support note "OAM 11gR2 : OAM Server Deployment Shows Status "Failed" And Error "Datasource jdbc/oamds not found" is Displayed (Doc ID 1586388.1)". There's a simple workaround described in that article that solves the issue.
2. Error "OAMSSA-06252: The policy store is not available"
The solution to the problem is described in My Oracle Support note "OAM 11g: WLS Will Break Access to OAM Policy Store - "OAMSSA-06252: The policy store is not available;" (Doc ID 1572620.1)"
7. Start AdminServer
1. Login to oamserver1 as installation user2. Create security directory for AdminServer in "E:/Oracle/11.1.2.2/admin/domains/oam_domain/servers/AdminServer/security"3. Create boot.properties file with the following contentusername=weblogicpassword=*******4. Start AdminServer executing script "E:/Oracle/11.1.2.2/admin/domains/oam_domain/bin/startWeblogic.cmd"
8. Configure NodeManager
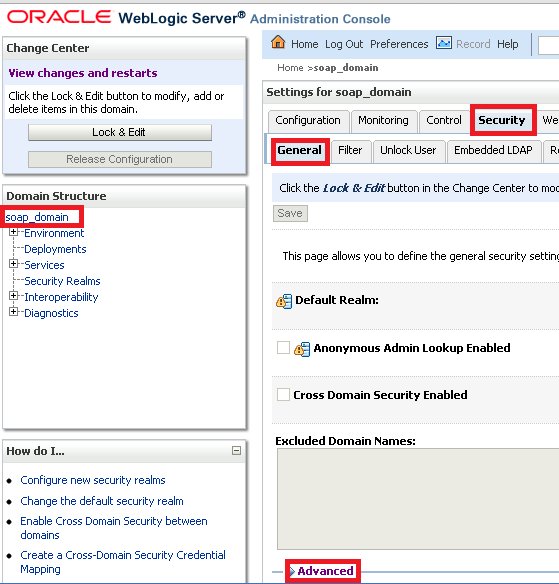
1. Login to the Weblogic Administration Console on "http://oamserver1.mydom.com:7001/console"
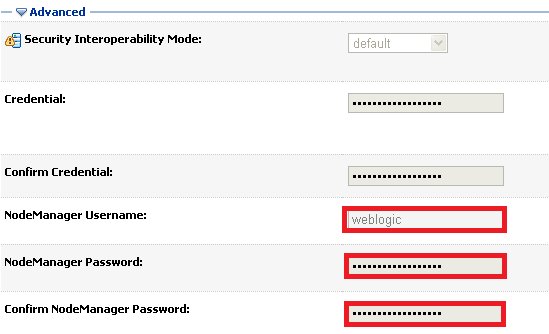
2. Go to "Domain" > "Security" > "Advanced" tabs, set values for "NodeManager Username" and "NodeManager Password
3. Login to oamserver1 using the installation owner user
4. Start a command window with "Start > Run > cmd"
5. Execute "E:/\Oracle\/11.1.1.7/\middleware/\wlserver_10.3\/server/bin/installNodeMgrSvc.cmd"

9. Create AdminServer start Script
1. Login to oamserver1 as installation owner
2. Go to directory 'E:/\Oracle/\11.1.2.2/\admin/\domains/\oam_domain/\bin
3. Create file startAdminServewithNMr.py with the following content:
nmConnect(username='weblogic',password='********',port='5556',domainName='oam_domain',domainDir='E:/\Oracle/\11.1.2.2/\admin/\domains/\oam_domain',nmType='ssl')
nmStart('AdminServer')Remember to change username and password for the values used in the previous step.
4. Create file startAdminServer.cmd:
set CLASSPATH=E:/\Oracle/\11.1.2.2/\middleware/\patch_wls1036/\profiles/\default/\sys_manifest_classpath/\weblogic_patch.jar;E:/\Oracle/\11.1.2.2/\middleware/\patch_ocp371/\profiles/\default/\sys_manifest_classpath/\weblogic_patch.jar;E:/\Java/\JRockit/\lib/\tools.jar;E:/\Oracle/\11.1.2.2/\middleware/\wlserver_10.3/\server/\lib/\weblogic_sp.jar;E:/\Oracle/\11.1.2.2/\middleware/\wlserver_10.3/\server/\lib/\weblogic.jar;E:/\Oracle/\11.1.2.2/\middleware/\modules/\features/\weblogic.server.modules_10.3.6.0.jar;E:/\Oracle/\11.1.2.2/\middleware/\wlserver_10.3/\server/\lib/\webservices.jar;E:/\Oracle/\11.1.2.2/\middleware/\modules/\org.apache.ant_1.7.1/\lib/\ant-all.jar;E:/\Oracle/\11.1.2.2/\middleware/\modules/\net.sf.antcontrib_1.1.0.0_1-0b2/\lib/\ant-contrib.jar;;E:/\Oracle/\11.1.2.2/\middleware/\oracle_common/\modules/\oracle.jrf_11.1.1/\jrf-wlstman.jar;E:/\Oracle/\11.1.2.2/\middleware/\oracle_common/\common/\wlst/\lib/\adf-share-mbeans-wlst.jar;E:/\Oracle/\11.1.2.2/\middleware/\oracle_common/\common/\wlst/\lib/\adfscripting.jar;E:/\Oracle/\11.1.2.2/\middleware/\oracle_common/\common/\wlst/\lib/\mdswlst.jar;E:/\Oracle/\11.1.2.2/\middleware/\oracle_common/\common/\wlst/\resources/\auditwlst.jar;E:/\Oracle/\11.1.2.2/\middleware/\oracle_common/\common/\wlst/\resources/\igfwlsthelp.jar;E:/\Oracle/\11.1.2.2/\middleware/\oracle_common/\common/\wlst/\resources/\jps-wls-trustprovider.jar;E:/\Oracle/\11.1.2.2/\middleware/\oracle_common/\common/\wlst/\resources/\jps-wlst.jar;E:/\Oracle/\11.1.2.2/\middleware/\oracle_common/\common/\wlst/\resources/\jrf-wlst.jar;E:/\Oracle/\11.1.2.2/\middleware/\oracle_common/\common/\wlst/\resources/\oamap_help.jar;E:/\Oracle/\11.1.2.2/\middleware/\oracle_common/\common/\wlst/\resources/\oamAuthnProvider.jar;E:/\Oracle/\11.1.2.2/\middleware/\oracle_common/\common/\wlst/\resources/\ossoiap.jar;E:/\Oracle/\11.1.2.2/\middleware/\oracle_common/\common/\wlst/\resources/\ossoiap_help.jar;E:/\Oracle/\11.1.2.2/\middleware/\oracle_common/\common/\wlst/\resources/\ovdwlsthelp.jar;E:/\Oracle/\11.1.2.2/\middleware/\oracle_common/\common/\wlst/\resources/\sslconfigwlst.jar;E:/\Oracle/\11.1.2.2/\middleware/\oracle_common/\common/\wlst/\resources/\wsm-wlst.jar;E:/\Oracle/\11.1.2.2/\middleware/\utils/\config/\10.3/\config-launch.jar;E:/\Oracle/\11.1.2.2/\middleware/\wlserver_10.3/\common/\derby/\lib/\derbynet.jar;E:/\Oracle/\11.1.2.2/\middleware/\wlserver_10.3/\common/\derby/\lib/\derbyclient.jar;E:/\Oracle/\11.1.2.2/\middleware/\wlserver_10.3/\common/\derby/\lib/\derbytools.jar;;
java weblogic.WLST AdminServerwithNM.py
10. Start AdminServer and Managed Server
1. Execute script startAdminServer.cmd
2. Login to Weblogic Server Administration Console on http://oamserver1.mydom.com:7001/console
3. Go to "Environment" > "Servers" > "Control". Then start managed server "oam_server1"
11. Login to OAMConsole
1. Open a browser window. Login to "http://oamserver1.mydom.com:7001/oamconsole"
Disclaimer - Views expressed in this blog are author's own and do not necessarily represents the policies of aclnz.com