- Home
- Subscribe
- Fusion
-
EBS
- Subscribe EBS Training
- EBS Installation
- EBS Short-Term Consulting
-
EBS Functional Courses
- Fundamentals
- Financials
- SCM
- Supplier Management
-
Procurement
- R12i Oracle Procurement Contracts Fundamentals
- R12i Oracle Sourcing Fundamentals
- R12i Oracle Sourcing - Advanced
- R12i Oracle Purchasing Fundamentals
- R12i Oracle Purchasing - Advanced
- R12i Oracle iProcurement Fundamentals
- R12i Oracle Services Procurement Fundamentals
- R12i Oracle iSupplier Portal Fundamentals
- R12i Oracle Services Procurement Fundamentals - processes for Fixed Priced Contracts
- CRM
- Order Management
- Service
- Grants Management
- Projects
- Discrete Manufacturing
-
EBS Apps DBA Courses
- R11i Oracle E-Business Suite Installation
- R12.2 Install, Patch and Maintain Oracle E-Business Suite
- Oracle E-Business Suite Release 12.2.4 Installation and Patching - End To End
- Oracle E-Business Suite Release 12.2.7 Installation and Patching on Oracle Linux 7.5
- Oracle E-Business Suite Release 12.2 Installation in Cloud Server
- Oracle E-Business Suite Release 12.2.0 to 12.2.5 Upgrade in Cloud Server
- Implementation Method
- Download - Process Flows
- Everything Club
- Pricing
- Interests
- Resources
- Home
- Subscribe
-
Fusion
- Subscribe Fusion Training
- Fusion Cloud Functional Courses
- Fusion Apps DBA Course
- EBS
- Subscribe EBS Training
- EBS Installation
- EBS Short-Term Consulting
-
EBS Functional Courses
- Fundamentals
- Financials
- SCM
- Supplier Management
-
Procurement
- R12i Oracle Procurement Contracts Fundamentals
- R12i Oracle Sourcing Fundamentals
- R12i Oracle Sourcing - Advanced
- R12i Oracle Purchasing Fundamentals
- R12i Oracle Purchasing - Advanced
- R12i Oracle iProcurement Fundamentals
- R12i Oracle Services Procurement Fundamentals
- R12i Oracle iSupplier Portal Fundamentals
- R12i Oracle Services Procurement Fundamentals - processes for Fixed Priced Contracts
- CRM
- Order Management
- Service
- Grants Management
- Projects
- Discrete Manufacturing
-
EBS Apps DBA Courses
- R11i Oracle E-Business Suite Installation
- R12.2 Install, Patch and Maintain Oracle E-Business Suite
- Oracle E-Business Suite Release 12.2.4 Installation and Patching - End To End
- Oracle E-Business Suite Release 12.2.7 Installation and Patching on Oracle Linux 7.5
- Oracle E-Business Suite Release 12.2 Installation in Cloud Server
- Oracle E-Business Suite Release 12.2.0 to 12.2.5 Upgrade in Cloud Server
- Implementation Method
- Download - Process Flows
- Everything Club
- Pricing
- Interests
Loading cover... Drag cover to reposition
Installing RHEL 7.1 (Maipo) on Oracle VM VirtualBox - Part 2
On this blog I will go through the steps required to boot the RHEL 7.1 installation media and complete an installation of a typical WEB server.
If you need help setting up your Oracle VirtualBox VM before starting the install, please che out this other post: Installing RHEL 7.1 (Maipo) on Oracle VM VirtualBox
Before you start you can check that your system is listed in the most recent list of supported hardware in the Red Hat Hardware Compatibility List, available online at: https://access.redhat.com/ecosystem/search/#/category/Server.
To install Red Hat Enterprise Linux you must have a minimum of 8 GB of disk space on the target system. The installation program also requires at least 1 GB of RAM to be available on the system, but installation on bare metal hardware (not as a virtualization host) requires 2 GB of RAM.
Once you confirmed that your system matches the above mentioned requirements you can proceed with the next steps.
- Start your system and boot from the RHEL 7.1 media. Once it's up select the "Install Red Hat Enterprise Linux 7.1" option and hit enter.
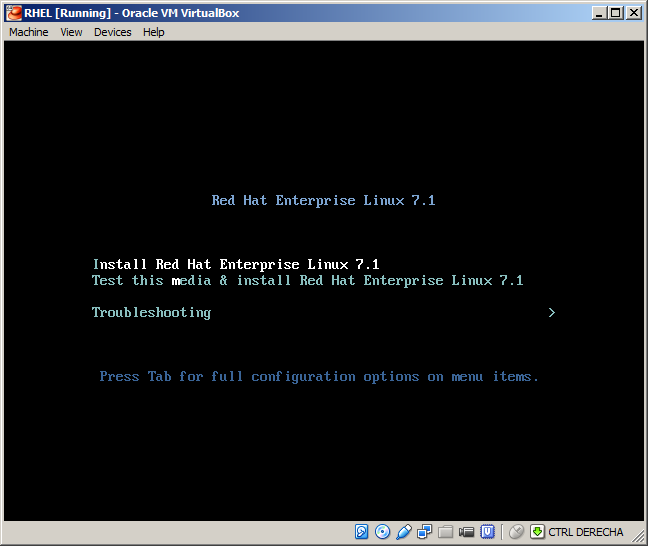
- The installation GUI should start up and you should get this screen:
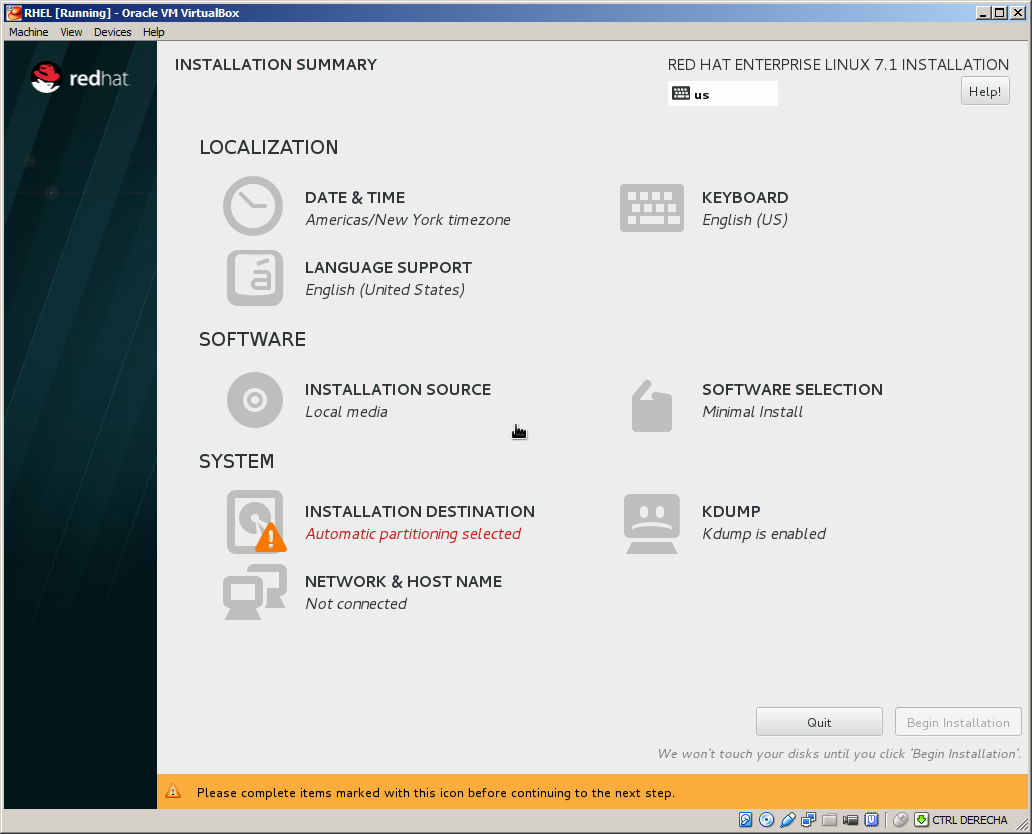
NOTE: This screen should show no warning messages other than the "Installation Destination". If you get warnings on the "Installation Source" or "Installation Selections" you should check that the correct installation media has been inserted on the system. To make the installation media available from an Oracle VirtualBox VM please follow this link: Installing RHEL 7.1 (Maipo) on Oracle VM VirtualBox - Tab to the "Installation Selection" item and hit enter to configure it.
If you don't have any specific requirements the defaults should cover your needs.
Select the disk you want to use for your installation and hit the "Done" button at the upper left corner.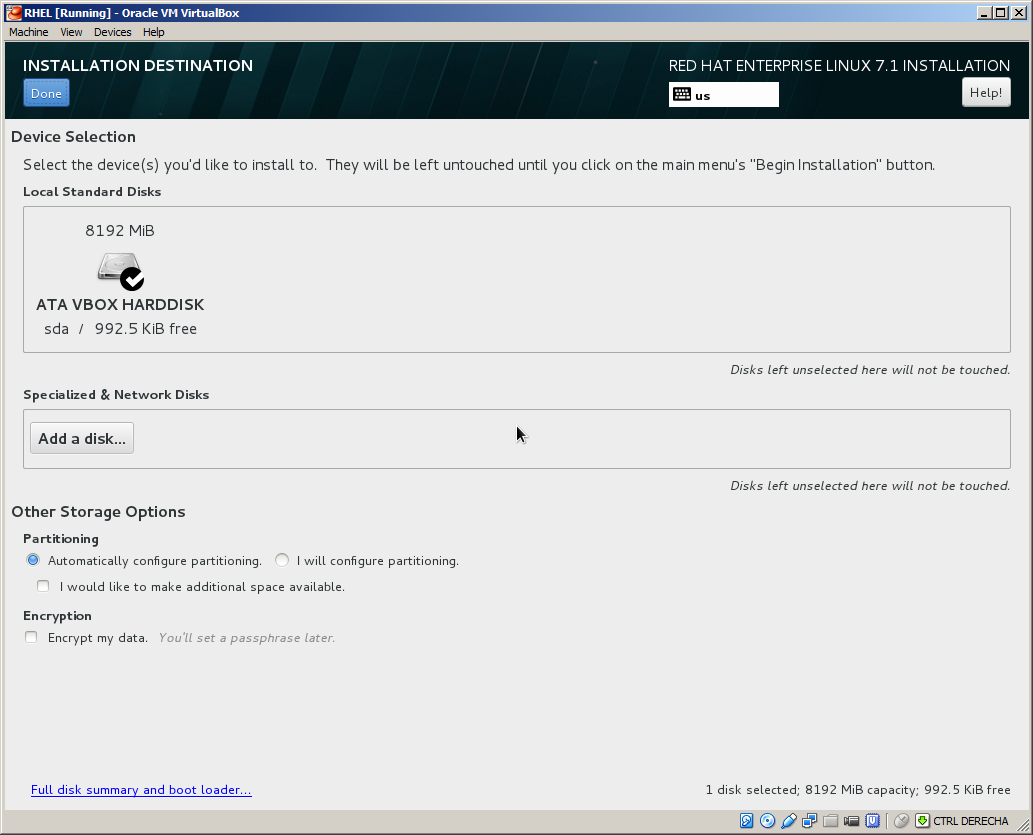
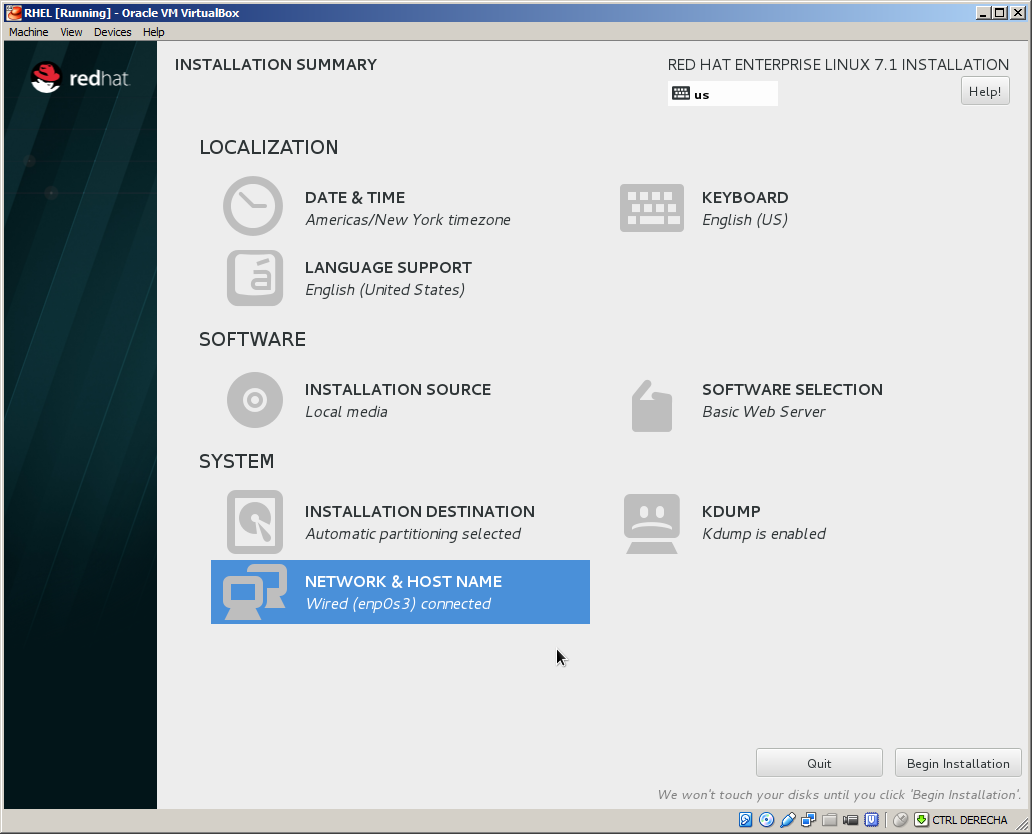
- At this stage your installation GUI should look like this:
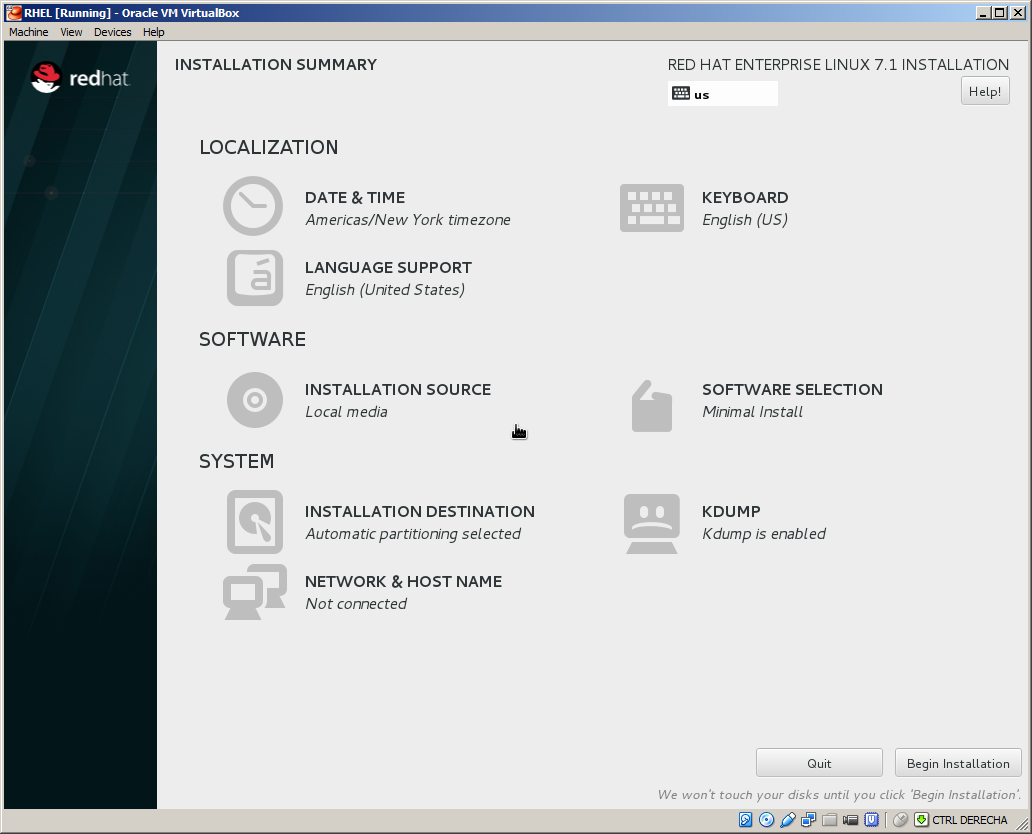
- For this particular installation we will proceed to select some extra software to create a typical WEB server.
Go to the "Software Selection" to modify it. - Change the "Base Environment" to "Basic web server" and then add this list of tools from the right panel: Debugging Tools, PHP Support, PstgreSQL, Python, Compatibility Libraries, Security Tools.
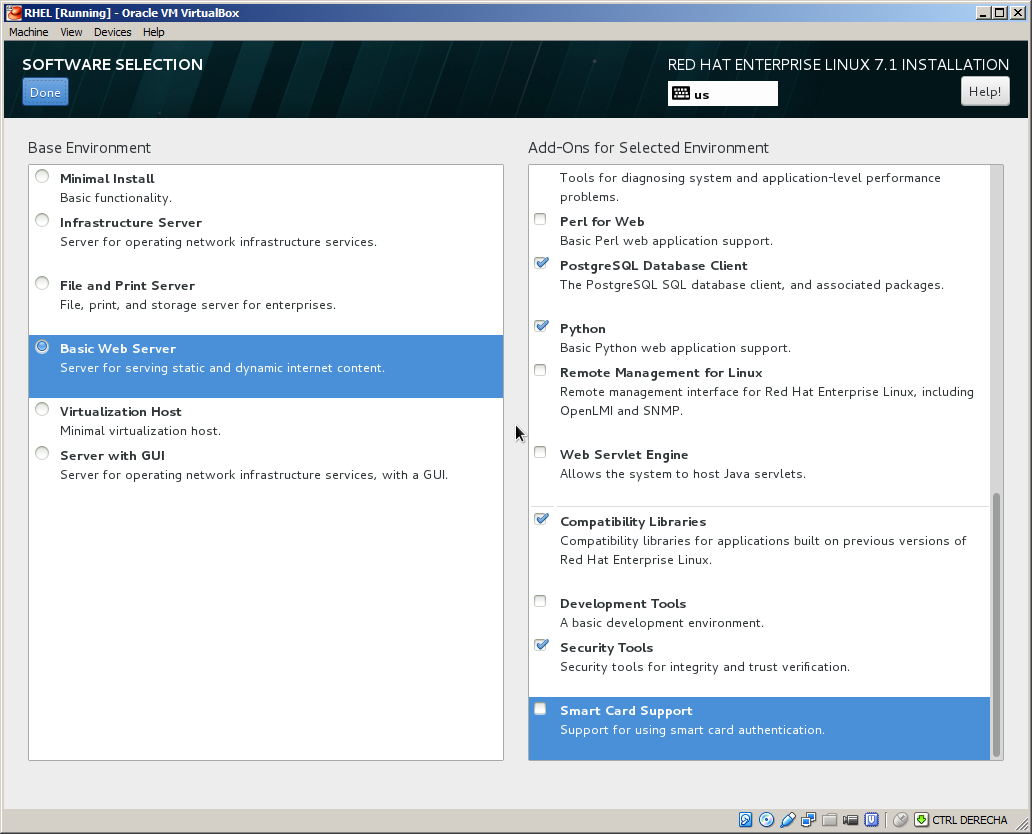
- After you are done with the selection hit "Done" to return to the GUI main screen.
NOTE: This software selection is a suggestion for a standard WEB server and can be modified according to what your system will run. - Now go to the "NETWORK & HOST NAME" section to configure the IP and hostname for your system.
Once on the section type the hostname on the lower left box (on this example mywebserver), then on/off button on the upper right corner to switch networking on.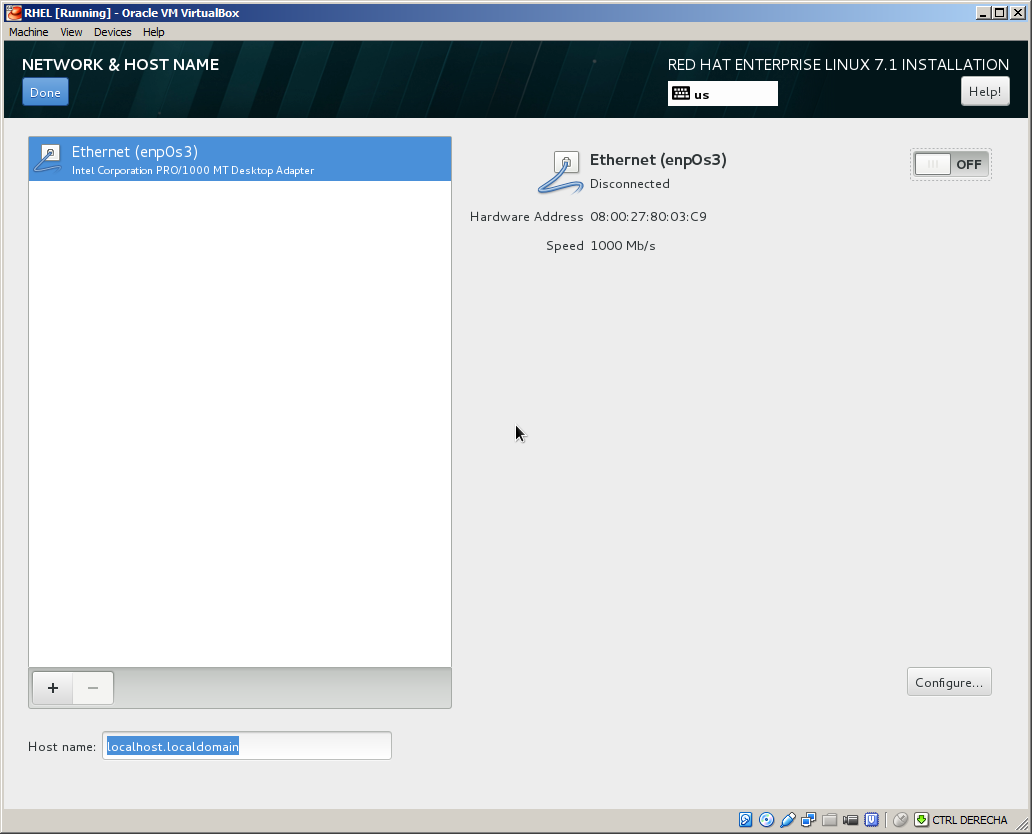
NOTE: On this example the target installation system has just one network interfaces, if yours happens to have more, you will need to pick each of them from the left side panel one at a time and repeat the following configuration steps for each of them. - At this point you should have your hostname set and networking enabled and ready to configure. Your screen should look like this:
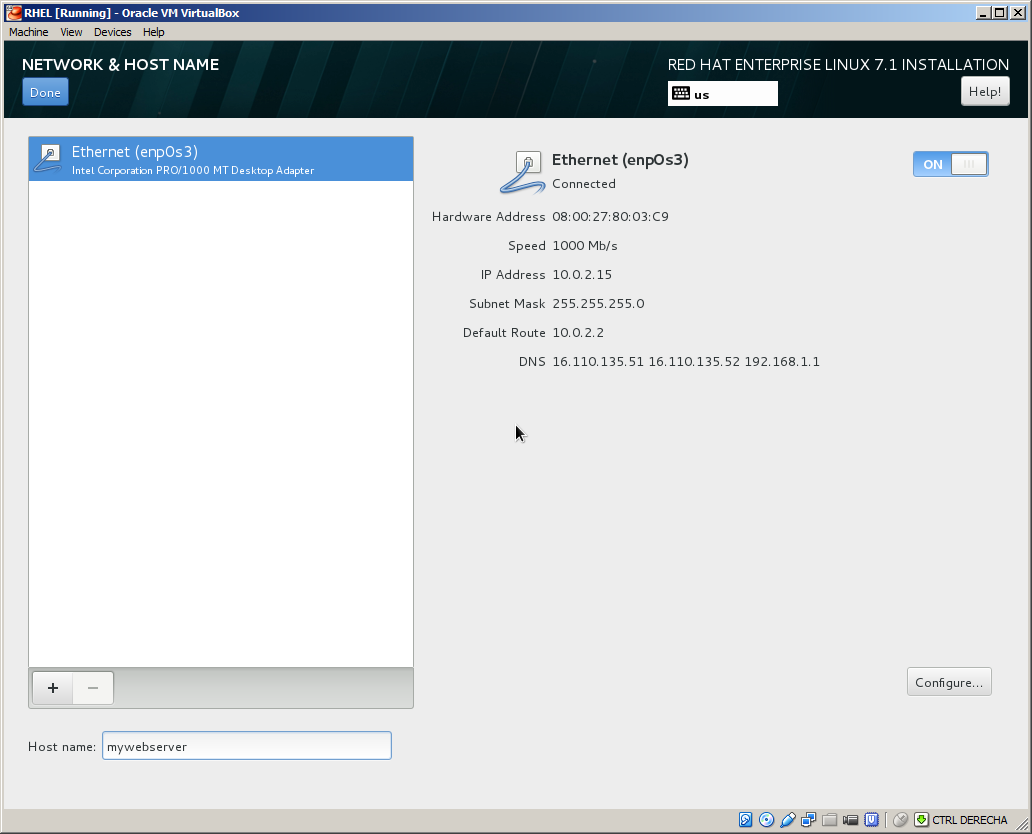
Click on the "Configure" button to set the network parameters of the adapter highlighted on the left panel. - Go to the Ethernet tab and click on the "Device MAC address" drop down menu to select the MAC address of the network interface you are configuring.
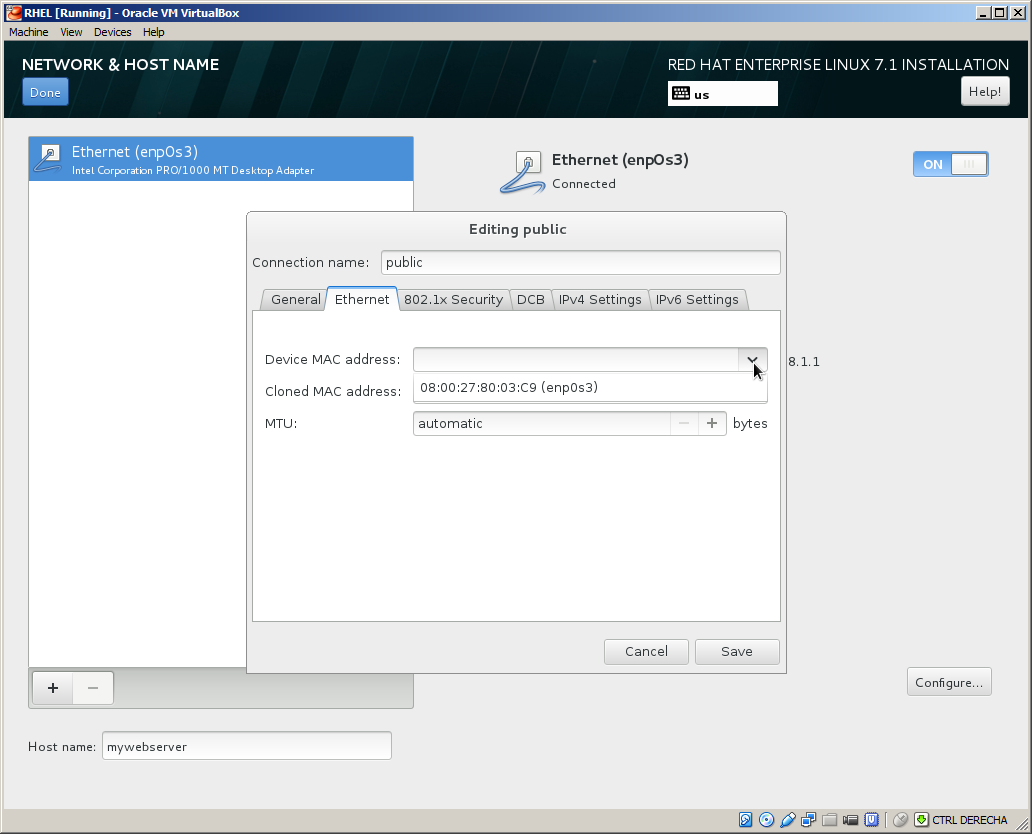
- Edit the "Connection name" on the top box. Make it something representative to its intended function. On this example it will be the only network interface and will face the WEB, so I called it public.
- Go to the "IPv4 Settings" tab to configure IP/MASK/DNS/Domain/Gateway.
Select the "Manual" "Method" from the drop down menu.
On this example you can see the following parameters set:
IP: 192.268.1.55
Network Mask: 24 or 255.255.255.0
Gateway: 192.168.1.1
DNS Server: 192.168.1.1
Search Domain: NONE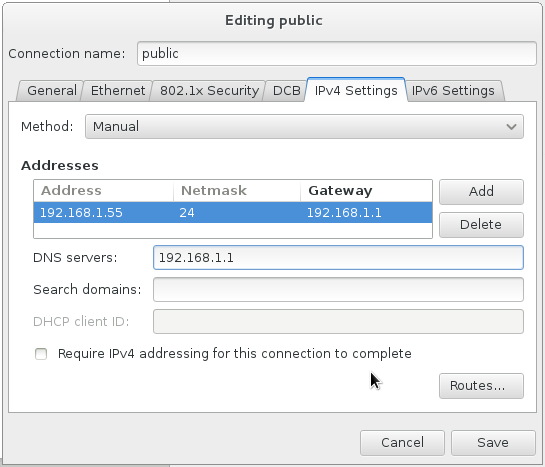
- Click on "Save" to go back to the "NETWORK & HOST NAME" section.
Your screen should show the network parameters that have just been set. Review this parameters and click on "Done" to go back to the main menu.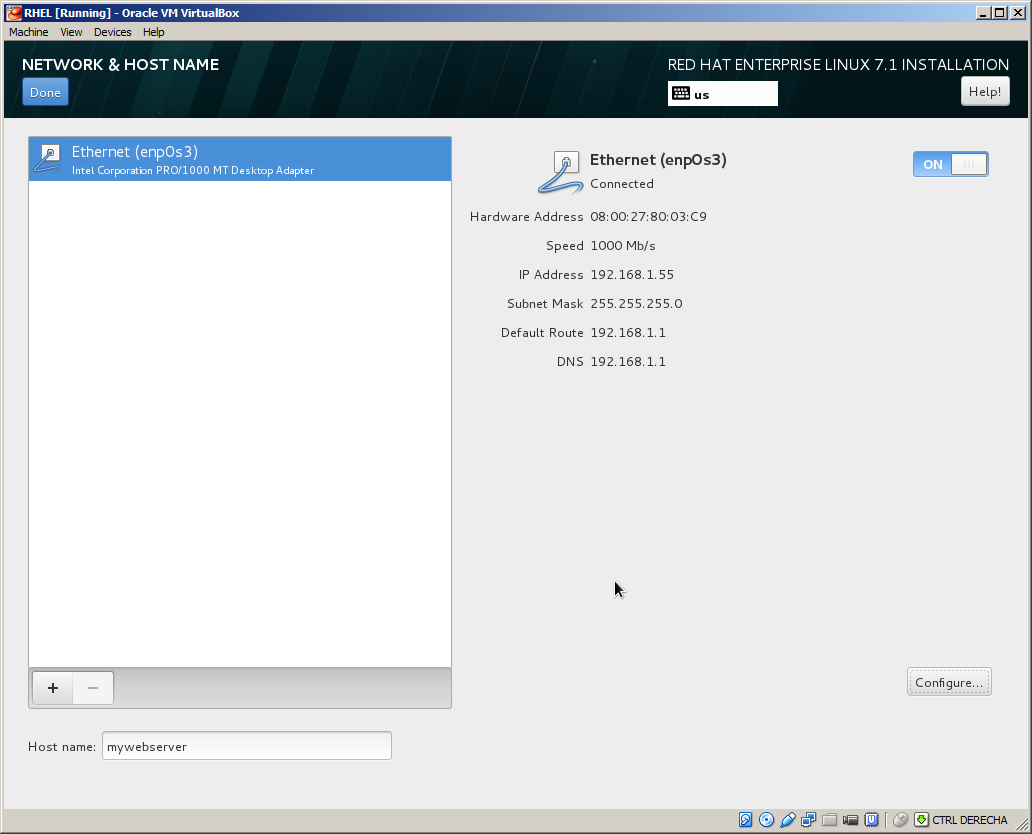
- At this point your GUI should look as follows and you should be ready to hit the "Begin Installation" button.
- While you have the install going you can go ahead and Set the Root password.
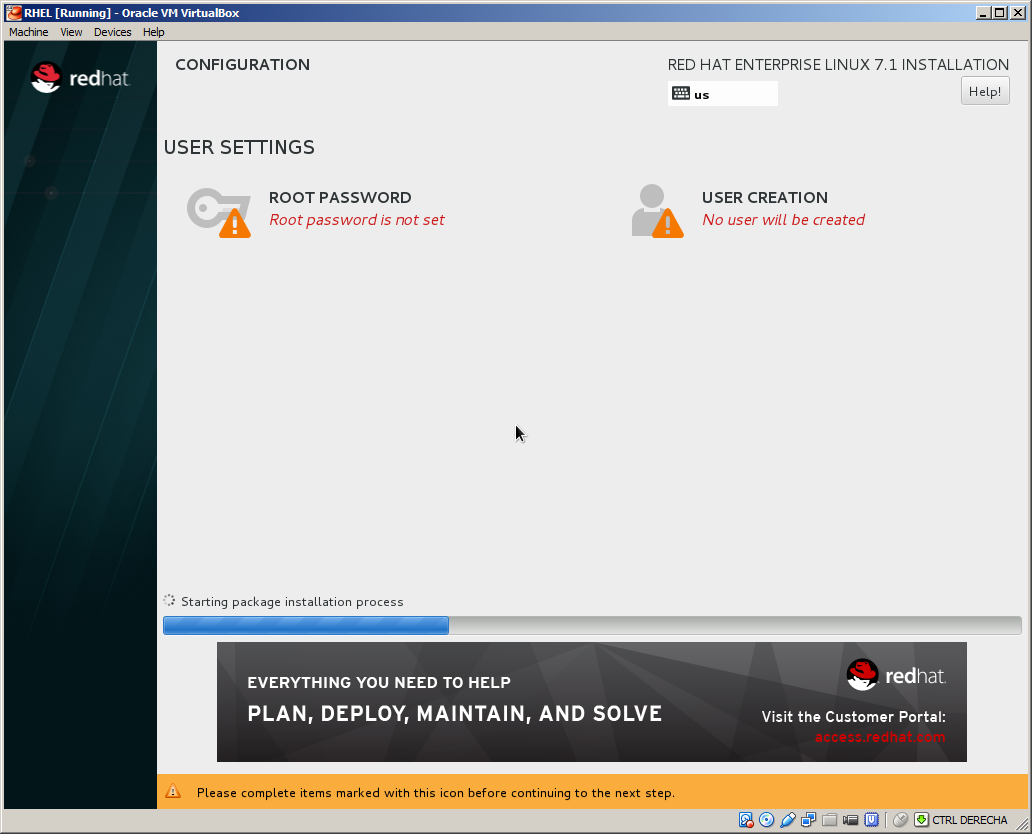
Make sure you add simbols|letters|numbers|uppercase|lowercase to get a strong password.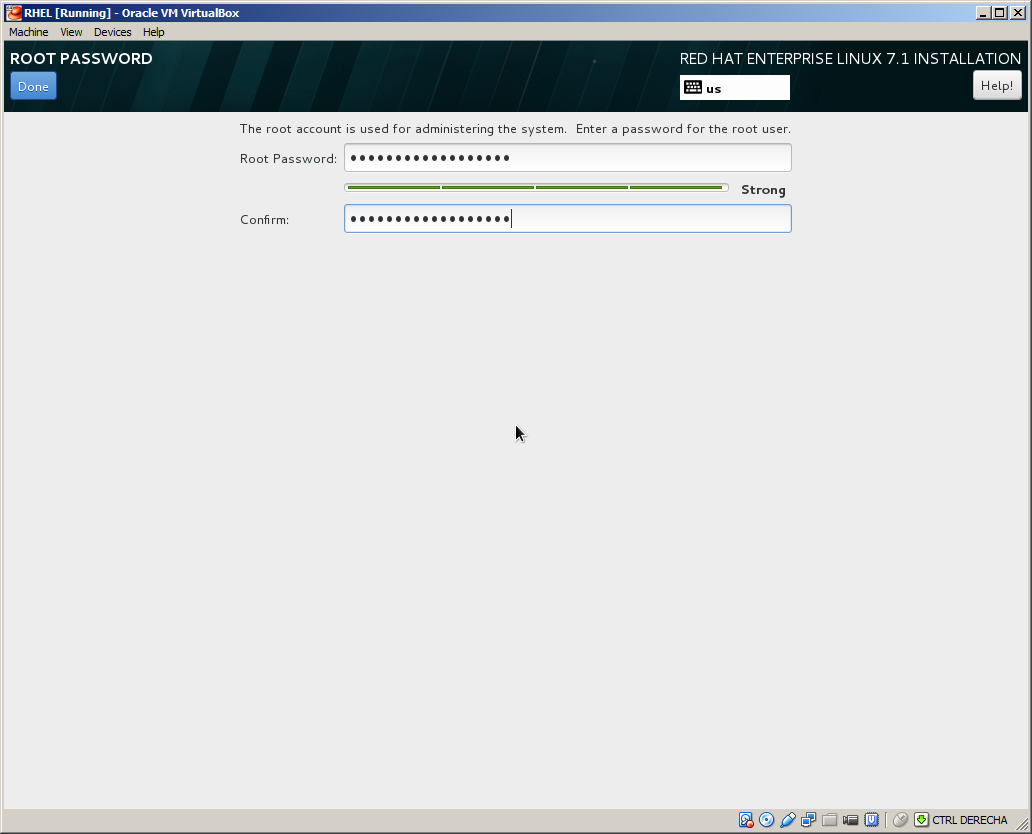
You should now get "Root password is set".
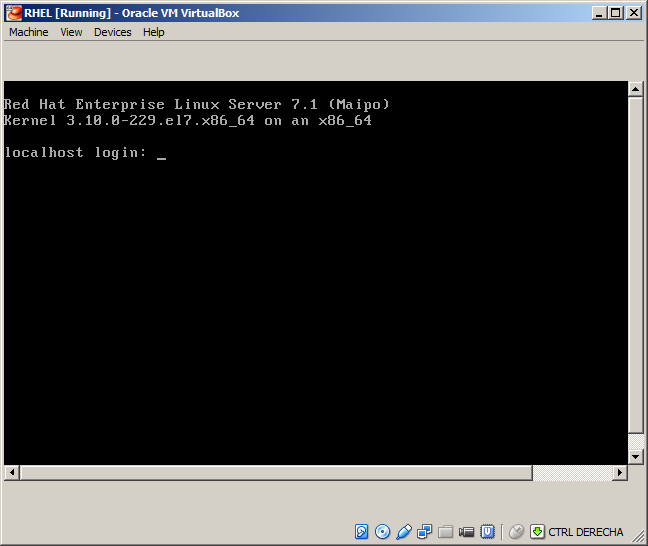
Wait until the blue progress bar is full and you get the "Complete!" message right on top of it.
- Click on the "Reboot" button and your system should do a power cycle and be online and ready to use!
Disclaimer - Views expressed in this blog are author's own and do not necessarily represents the policies of aclnz.com
Related Posts